

04 Sep A Simple Walkway
How To: Building a New Walkway
Have you contemplated on how you could build a new walkway? Or what kind you would even want? So have I. More recently since the time finally came around to do it. Although I didn’t personally build it myself I did help decide on the stone and made a great supervisor on this project! First off, it was like a four hour job and there wasn’t much for me to help with so I wasn’t asked to help.
The reason for changing what we had is easy…. it was ugly, uneven, and didn’t match the other new stones we had. Red pavers against our red brick blended and we want to our yard to stand out. Not to mention all of the white rock around it that somehow gets everywhere and into our grass. It clearly had seen better days and needed to go!
While I don’t have a great before picture to show exactly what I mean I do have the aftermath of what was left. The old walkway was pulled up several months before due to the fact we needed it out of the way to help for our new stones that border our flower beds.
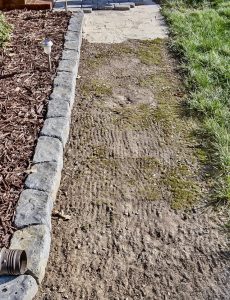 In this picture above you’ll see the beautiful new stone to the left from another project. But, this was the foundation of pure dirt that was leveled out with a tamper and rake to make the flattest ground possible for the new walkway. We don’t need wobbly uneven stones for people to break an ankle on!
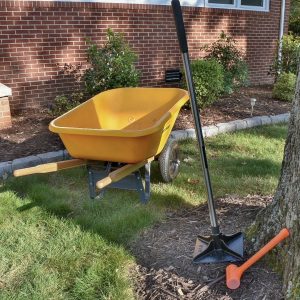
Below we have some of the major tools used. Not pictured is the rake, gloves, paver set bucket, and sand.
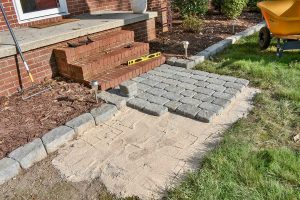
 After leveling everything off the first major step before having a beautiful new walkway is to pour and level the sand in all of the places your stones will be. This is your foundation so it is a pretty important step! We suggest doing a little at a time at the beginning so you can get your pattern down but you won’t be tracking sand everywhere either. Below, you’ll see we did just that, a little at a time at the stairs so we didn’t end up with an uneven pattern at the opposite end of the walkway.
 Getting started with a pattern you want is honestly the hardest part. Well, besides making sure everything is even!
Once you get going at a nice pace and a pattern you like then you’ll be done before you know it. The next step afterwards is laying down that paver set. If you don’t know what that is the best way I can describe it is basically darker looking sand that hardens from water. I had never seen that stuff work until we did this! Brush the paver sand in to every nook and cranny of the stones because this is the glue that holds it all together. The very final step is watering it all in real well and then….
you’re done!
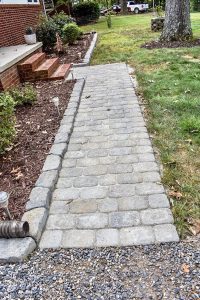
We now have a beautiful new walkway.
Side note: You may notice there is no border or even ending toward the grass. But, this fall when we seed the whole yard the grass will grow there again and be the border.
Final product

Even the simplest changes (and a bright red door) like this walkway can do wonders for curb appeal on your home. It can make someone passing by take a second glance or a neighbor stop and say how good it looks. Take a chance and see what changes can make your home stand out and maybe even sell better!
Are you ready for a new walkway? Check out these walkways that lead to a place you could call home!
Give us a like on our Facebook page to stay up to date with newly listed homes or if you are ready to sell.
Where did we find all the supplies needed for the project? Lowe’s